
PhoneLine+ users with Administrator privileges have the ability to create menus with personalised greetings that enable callers to choose their preferred call routing options, i.e. Press 1 for Sales, 2 for Support, etc.
 Creating Menus (desktop)
show more
To begin, let’s look at how menus are created within the ‘Admin Settings’ section of PhoneLine+. The following steps relate to configuration on the desktop app.
First, click the ‘Admin Settings’ padlock, then click ‘Menus’.

A list of existing menus will be presented here. You can use the navigation options at the bottom of the page to seamlessly move between menu pages.
To add a new menu, simply click ‘Add menu’.
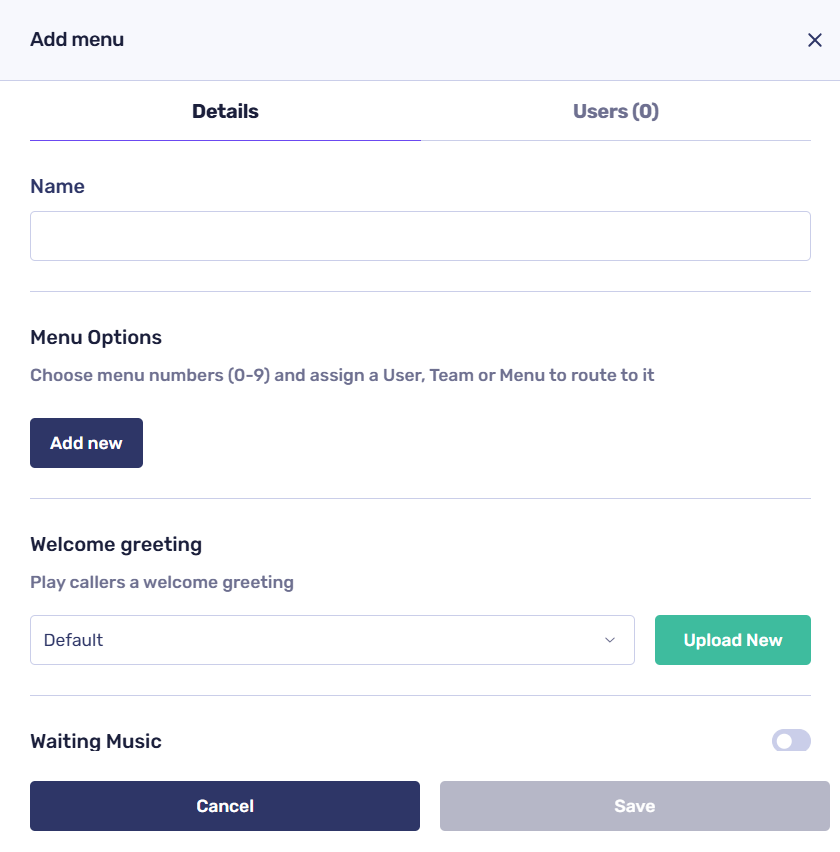
First, give your menu a name.
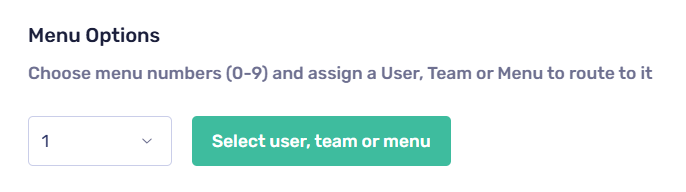
Configure your menu options
To configure the menu routing settings, start by clicking on ‘Add new’. This will allow you to assign a dial pad number to a user, team, or any previously configured menu.
To proceed, click on ‘Select user, team, or menu’ to access the following screen. Use the taskbar at the top to choose a user, team, or menu corresponding to the menu number you have already selected.
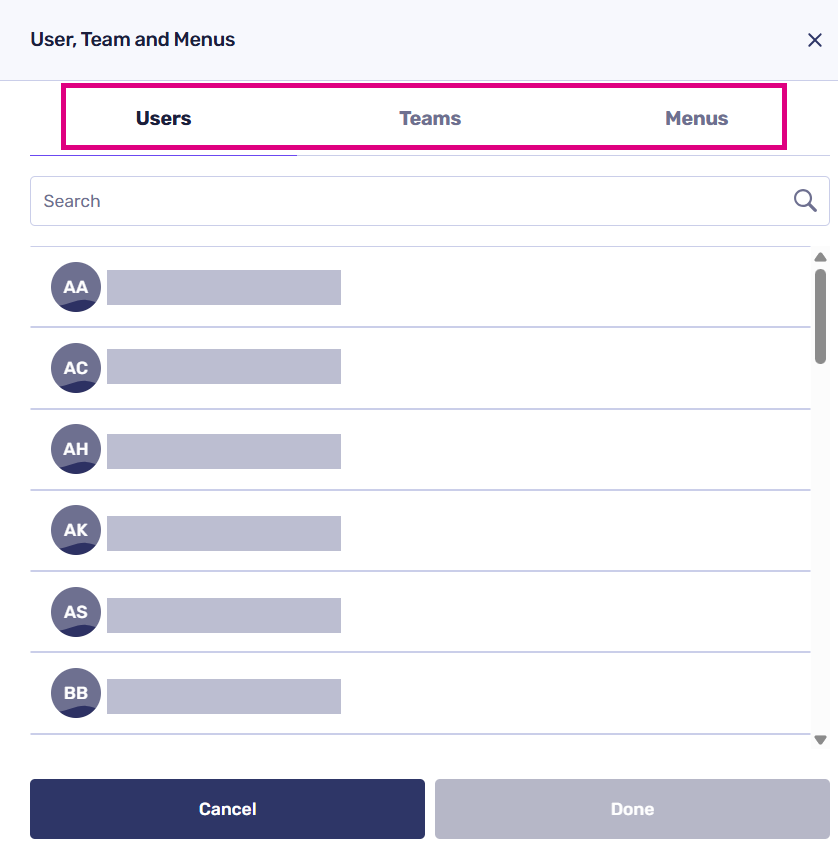
Once you have made your selection, click ‘Done’.
Upload or select your menu’s welcome greeting
Select an existing recording:
Navigate to the available recordings by clicking the ‘Default’ drop-down menu.
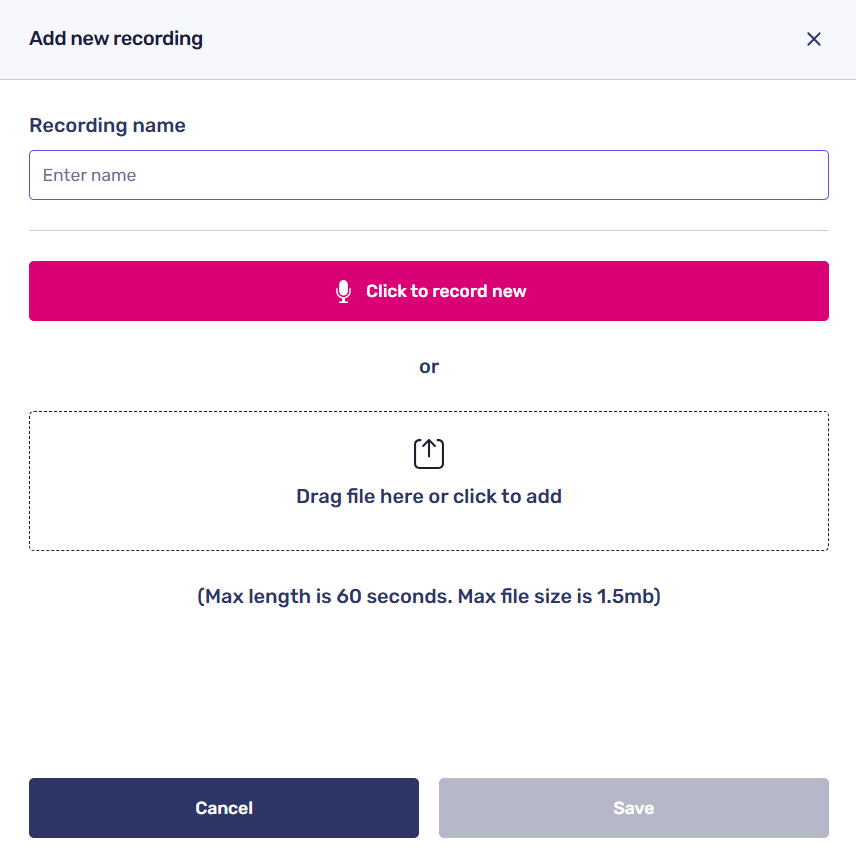
Upload a new recording:
Alternatively, you can upload a new recording if needed.
To add a new recording, first give it a name.
Then, either click to record a new one or drag a file into the drop zone to upload a recording from your computer or device. Please note that the same rules apply to all recording uploads within the app: the maximum length is 60 seconds, and the maximum file size is 1.5 MB.
Click ‘Save’ when you’re done.
You can also include waiting music and out-of-hours music as you adjust the settings. Just toggle these options on if you would like to incorporate them into your new menu.
Reject anonymous calls
Finally, choose if you’d like for the menu to reject anonymous calls by adjusting the toggle alongside this setting.
Simply click ‘Save’ to apply these settings to your new menu, and you’re all set!
Editing menus
Menu settings can be amended any time via the ‘Menus’ screen.
Simply click on the name of a Menu to:
- Update its details (including its name)
- Set a Voicemail PIN
- Choose a new number to assign to a user, team or menu to re-route it
- Remove a call routing option (user, team or menu)
- View the Menu’s number/CLI
- Amend the audio associated with the welcome greeting and waiting music
- Re-configure the Menu’s ‘out of hours’ settings
- Amend the Menu’s voicemail settings
- Adjust the Menu’s settings to manage the acceptance or rejection of anonymous calls.
You can also choose which PhoneLine+ users will receive notifications for the Menu.
show less Creating Menus (mobile)
show more
Let’s look at how menus are created within the ‘Admin Settings’ section of PhoneLine+. The following steps relate to configuration on the mobile app.
To begin, tap on the ‘Settings’ cog. Next, scroll down until you reach the ‘ADMIN’ section. Please note that all settings listed under this header are intended solely for PhoneLine+ administrators.
Tap ‘Menus’. A list of existing menus will be presented here.
To create a new menu, simply tap the ‘+’ icon located at the top right corner of the screen.

First, give your menu a name.
Configure your welcome greeting and/or waiting music
Next, select which settings you wish to apply to your new menu.
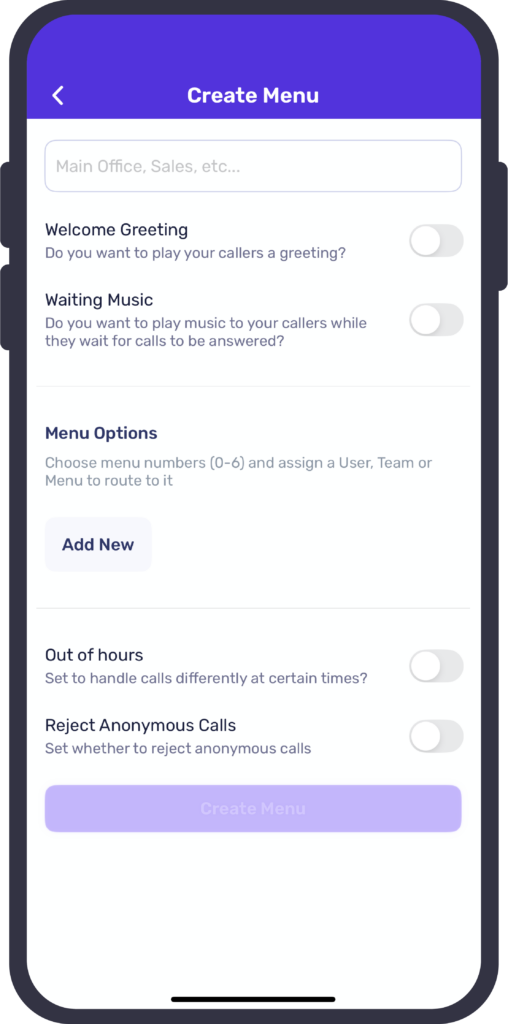
- Welcome Greeting – toggle this on if you wish for the menu to play callers a greeting.
- Waiting Music – toggle this on if you want to add/upload music which will play while a caller waits for their call to be answered.
When you choose either of these options, a screen will appear, allowing you to add or upload a new recording, or select an existing recording from your Audio Library.
If you wish to grant access to this recording for others in your organisation, toggle the ‘Share with Others’ option on. This will enable them to use the recording in their own PhoneLine+ settings configuration.
Please note that the same rules apply to all recording uploads within the app: the maximum length is 60 seconds, and the maximum file size is 1.5 MB.
Tap ‘Done’.
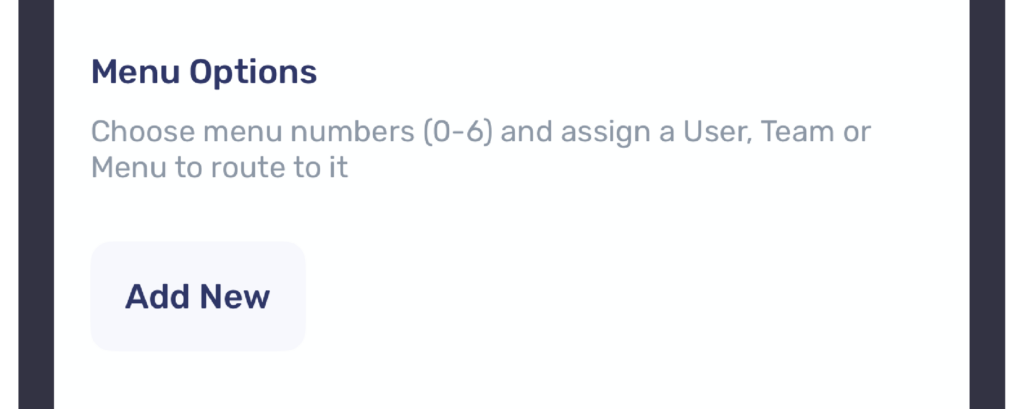
Configure your menu options
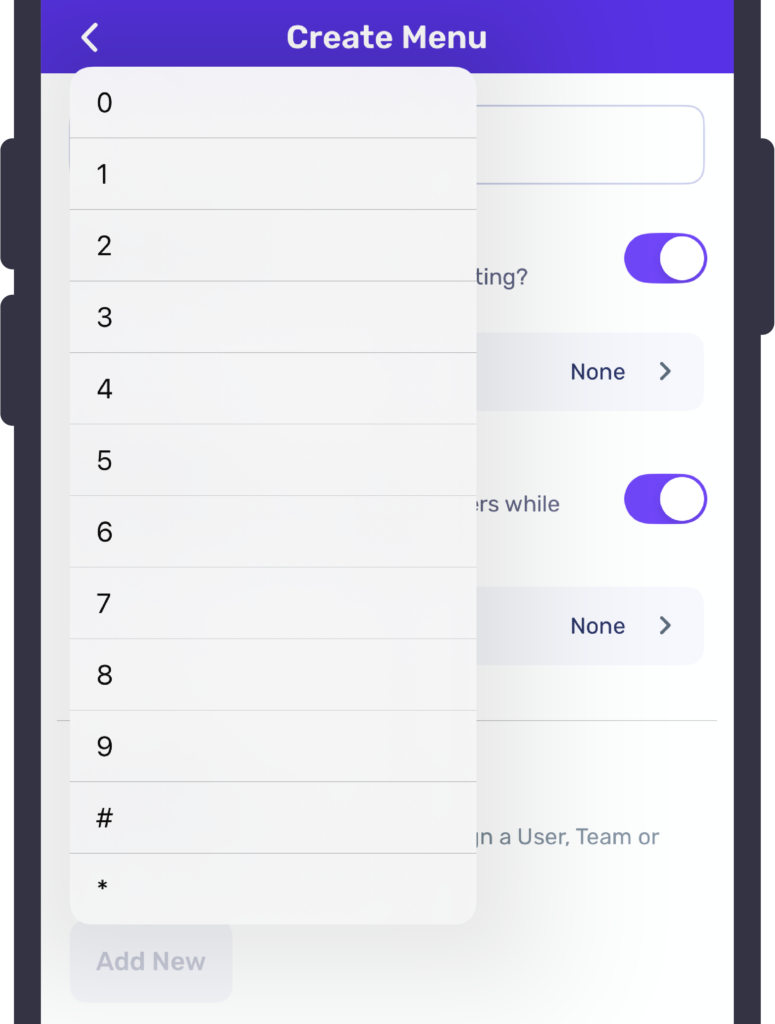
To configure the menu routing settings, start by tapping on ‘Add new’. This will allow you to assign a dial pad number to a user, team, or any previously configured menu.
Once you’ve selected a number (1 – * ), use the taskbar at the top to choose a user, team, or menu that you wish to assign to it.
Out of hours configuration for menus
You can configure the ‘Out of Hours’ settings for menus just like you do for your regular calls. To activate this feature, simply toggle the setting to the “on” position.
Set the menu’s availability for each day of the week independently.
Indicate the availability for that day, along with the specific timeframe during which calls will be answered (for example, menu availability might range from 7:15 AM to 5:00 PM).
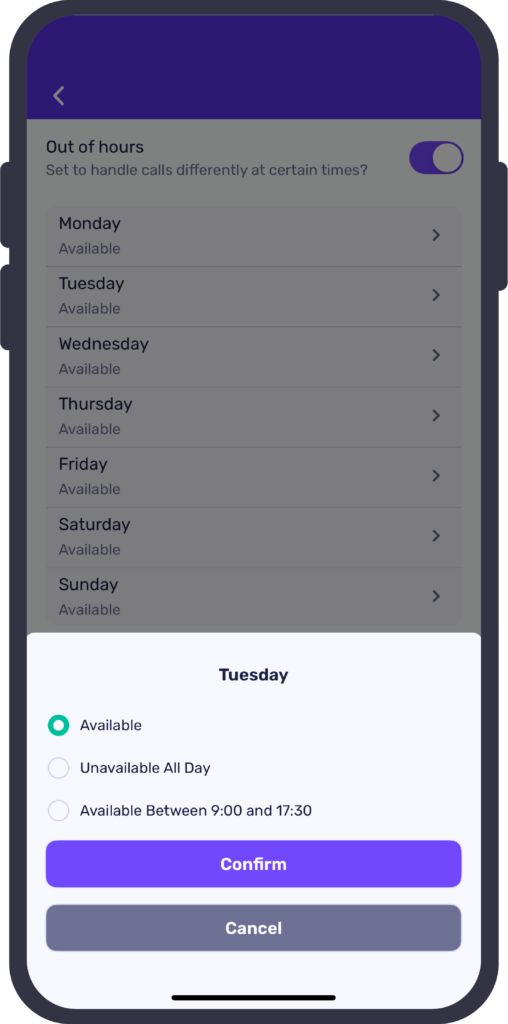
Tap ‘Confirm’ when you’re happy with your settings.
Reject anonymous calls
Finally, choose if you’d like for the menu to reject anonymous calls by adjusting the toggle alongside this setting.
Simply click ‘Save’ to apply these settings to your new menu, and you’re all set!
Editing menus
Menu settings can be amended any time via the ‘Menus’ screen.
Simply click on the name of a Menu to:
- Update its details (including its name)
- Set a Voicemail PIN
- Choose a new number to assign to a user, team or menu to re-route it
- Remove a call routing option (user, team or menu)
- View the Menu’s number/CLI
- Amend the audio associated with the welcome greeting and waiting music
- Re-configure the Menu’s ‘out of hours’ settings
- Amend the Menu’s voicemail settings
- Adjust the Menu’s settings to manage the acceptance or rejection of anonymous calls.
You can also choose which PhoneLine+ users will receive notifications for the Menu.
show less